NetBird
WARNING
Access to NetBird's website and control plane depends on the network from which the container is deployed. Verify connectivity before starting the container.
Deploying NetBird involves the following steps:
- Configure Full Cone NAT.
- Start the NetBird container and create a Flow that uses it as the egress.
- Configure routing so LAN clients can reach NetBird addresses and subnets.
Configuring Full Cone NAT
There are two ways to configure Full Cone NAT; use either method.
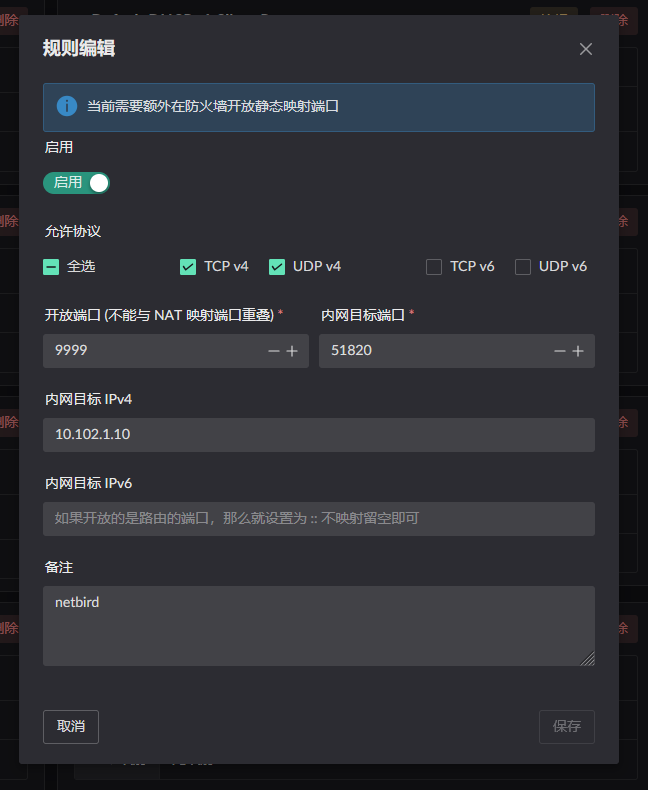
- Configure a static NAT mapping for the port NetBird uses,
51820. - Add NetBird's domain (netbird.io) to a DNS rule and turn the Full Cone switch on.
Either method also requires the Route LAN service to be enabled on the bridge to which the container is attached. 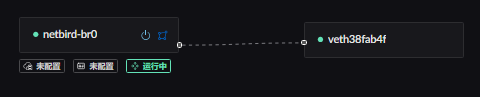
Static NAT configuration: the internal target port is the container port and the target IP is the container IP.
DNS / IP rule configuration
This example is not yet tested here; see the ZeroTier page for the same rule pattern.
Starting the container
WARNING
Set a fixed Docker bridge name. If Docker generates a new interface name after a restart, the LAN service cannot start correctly.
networks:
  my-netbird-bridge:
    driver: bridge
    driver_opts:
      # Keep the bridge name fixed so it remains stable across restarts.
      com.docker.network.bridge.name: netbird-br0
Start the container from the image built in the apps repository. The compose file below may be out of date; for the latest, see docker-compose.
Then start it with your own compose configuration.
services:
  netbird:
    image: ghcr.io/landscape-router/landscape-apps/netbird:latest
    container_name: mybird
    hostname: mybird
    cap_add:
      - NET_ADMIN
      - SYS_ADMIN
      - SYS_RESOURCE
      - BPF
      - PERFMON
    environment:
      - NB_SETUP_KEY=${SETUP_KEY}
    volumes:
      - ${DATA_PATH}:/var/lib/netbird
      # For lkit deployments, use /root/.lkit/landscape/data/unix_link/ as the host path.
      - /root/.landscape-router/unix_link/:/ld_unix_link/:ro
    networks:
      my-netbird-bridge:
        ipv4_address: 10.102.1.10
    dns:
      - 10.102.1.1

networks:
  my-netbird-bridge:
    driver: bridge
    driver_opts:
      # Keep the bridge name fixed so it remains stable across restarts.
      com.docker.network.bridge.name: netbird-br0
    ipam:
      config:
        - subnet: 10.102.1.0/24
          gateway: 10.102.1.1
Then create a Flow that uses this container as its egress. 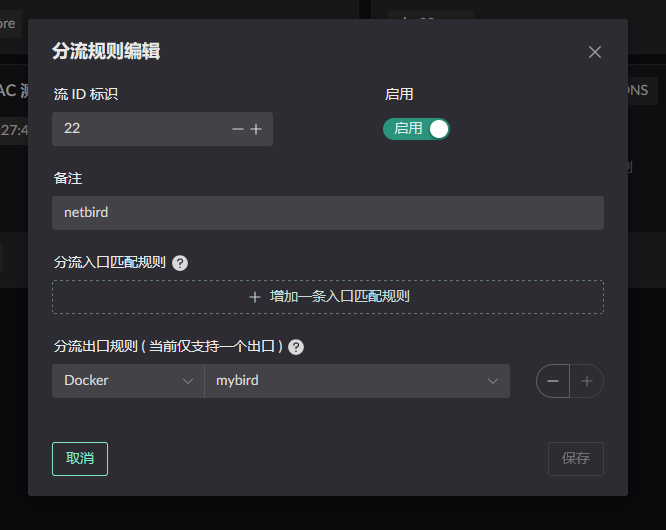
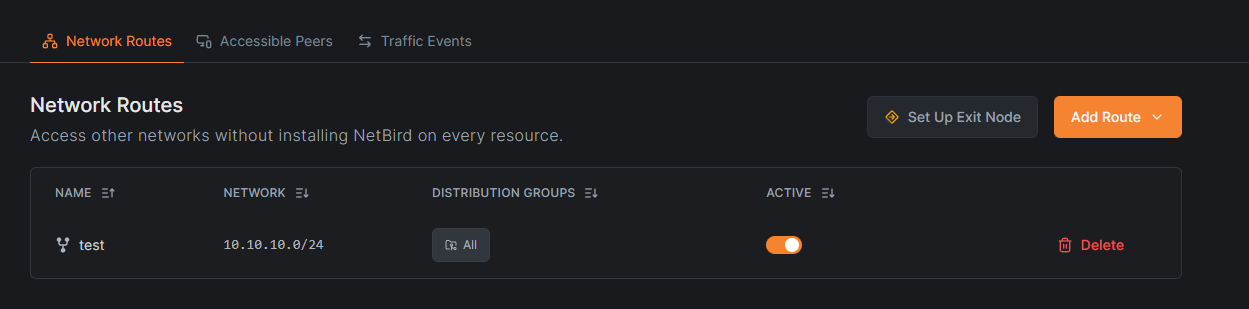
Add routes for the gateway node in the NetBird admin console. 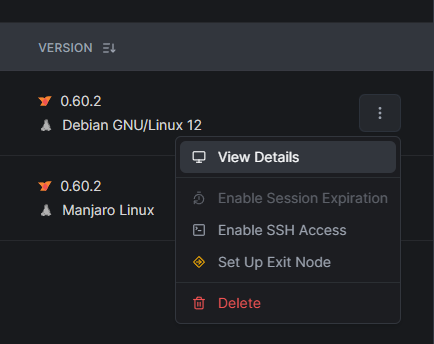
Configuring route rules
Click Destination IP on the relevant Flow to configure a rule. Only traffic matching that rule uses the Flow. 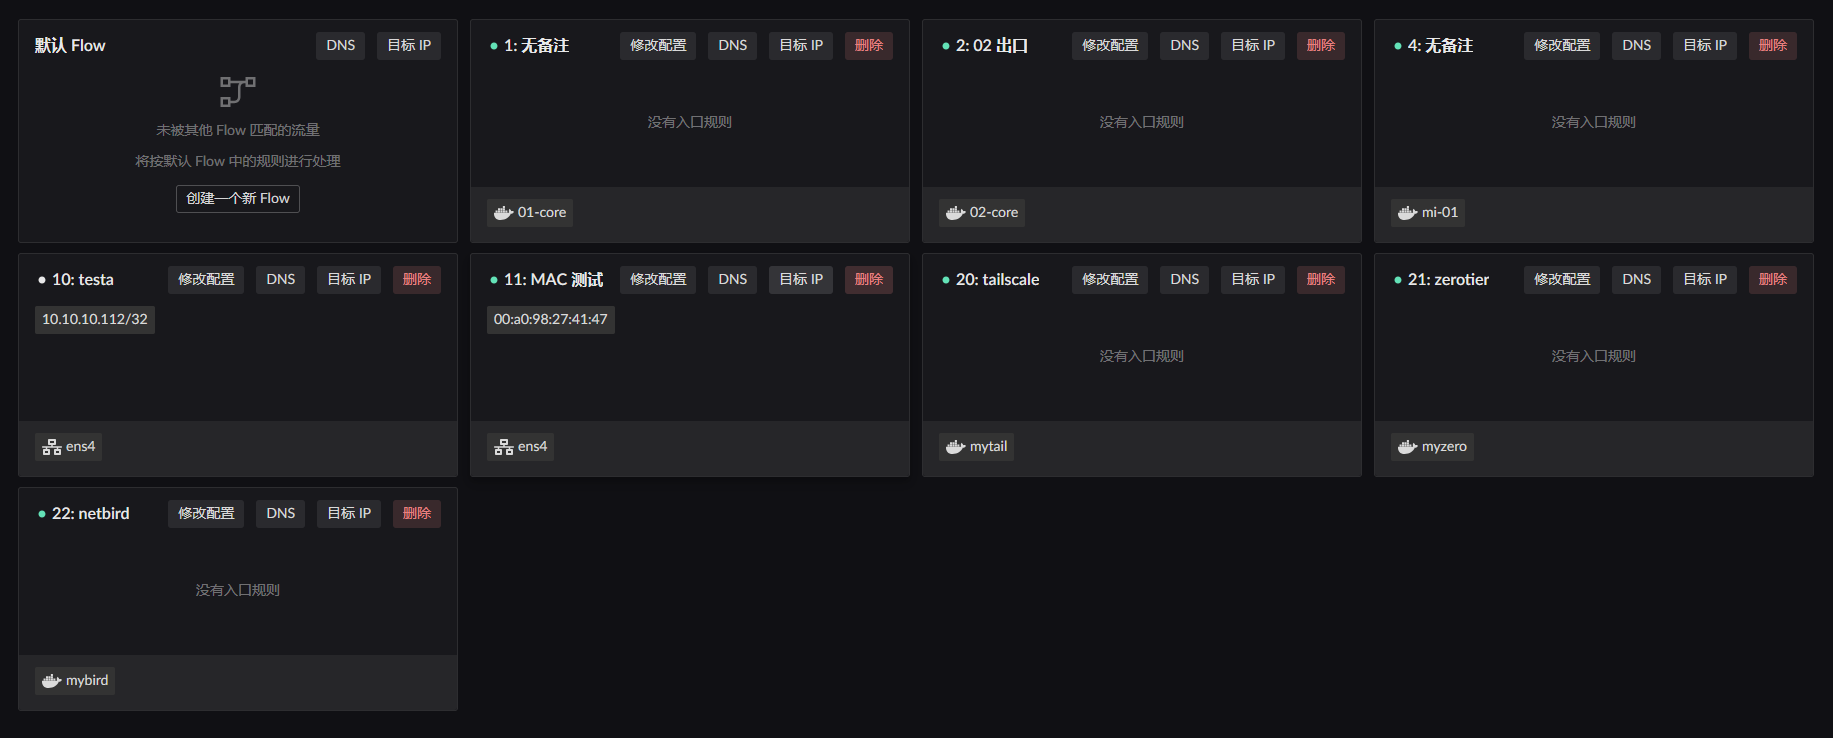
In this example, the LAN client with MAC address 00:a0:98:27:41:47 is governed by Flow 11. Configure Destination IP on Flow 11 and select Flow 22, the Flow created for the container, as the egress. 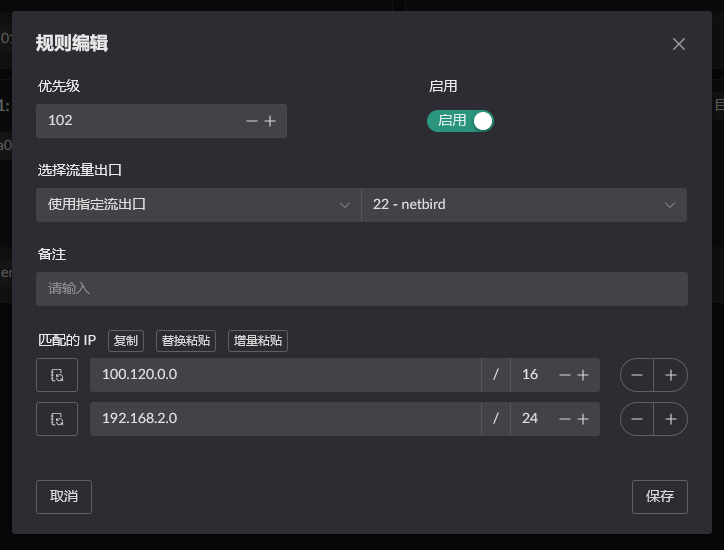
Traffic to 100.120.0.0/16 or 192.168.2.0/24 then uses the Flow 22 (NetBird) egress and is forwarded into the mybird container.
The
192.168.2.0/24example assumes NetBird is also deployed on the far side. In that case, configure the remote subnet directly to enable two-way access.
Verifying the result
The devices involved:
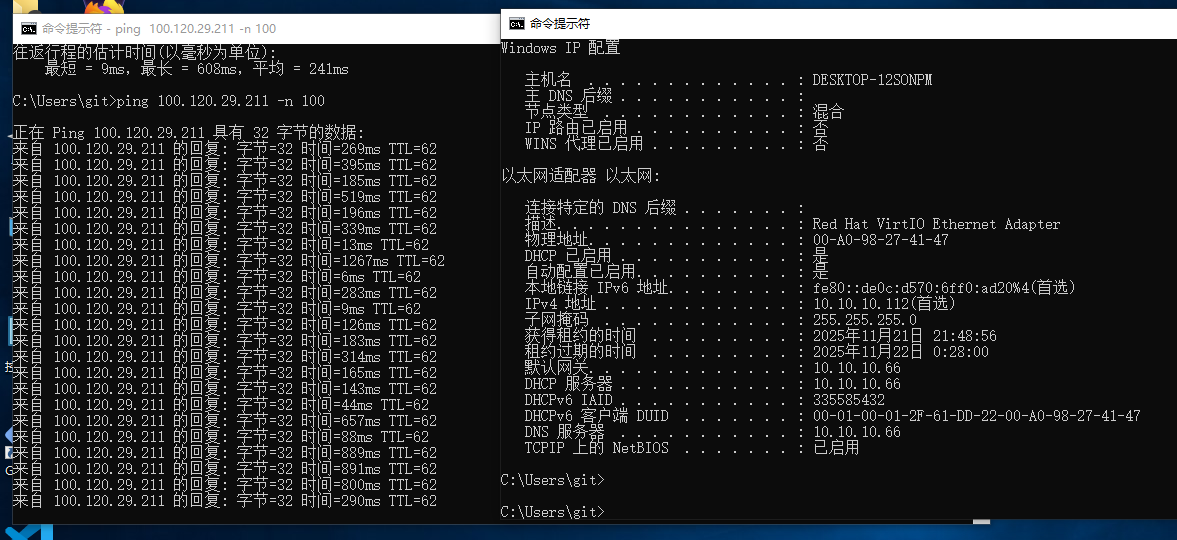
Device 1: 100.120.29.211, aNetBird clientnot deployed on the routerDevice 2: 100.120.126.160, theNetBird clientdeployed on the routerDevice 3: 10.10.10.112, a host on the router's LAN
- From
Device 1, pingDevice 3; traffic passes throughDevice 2.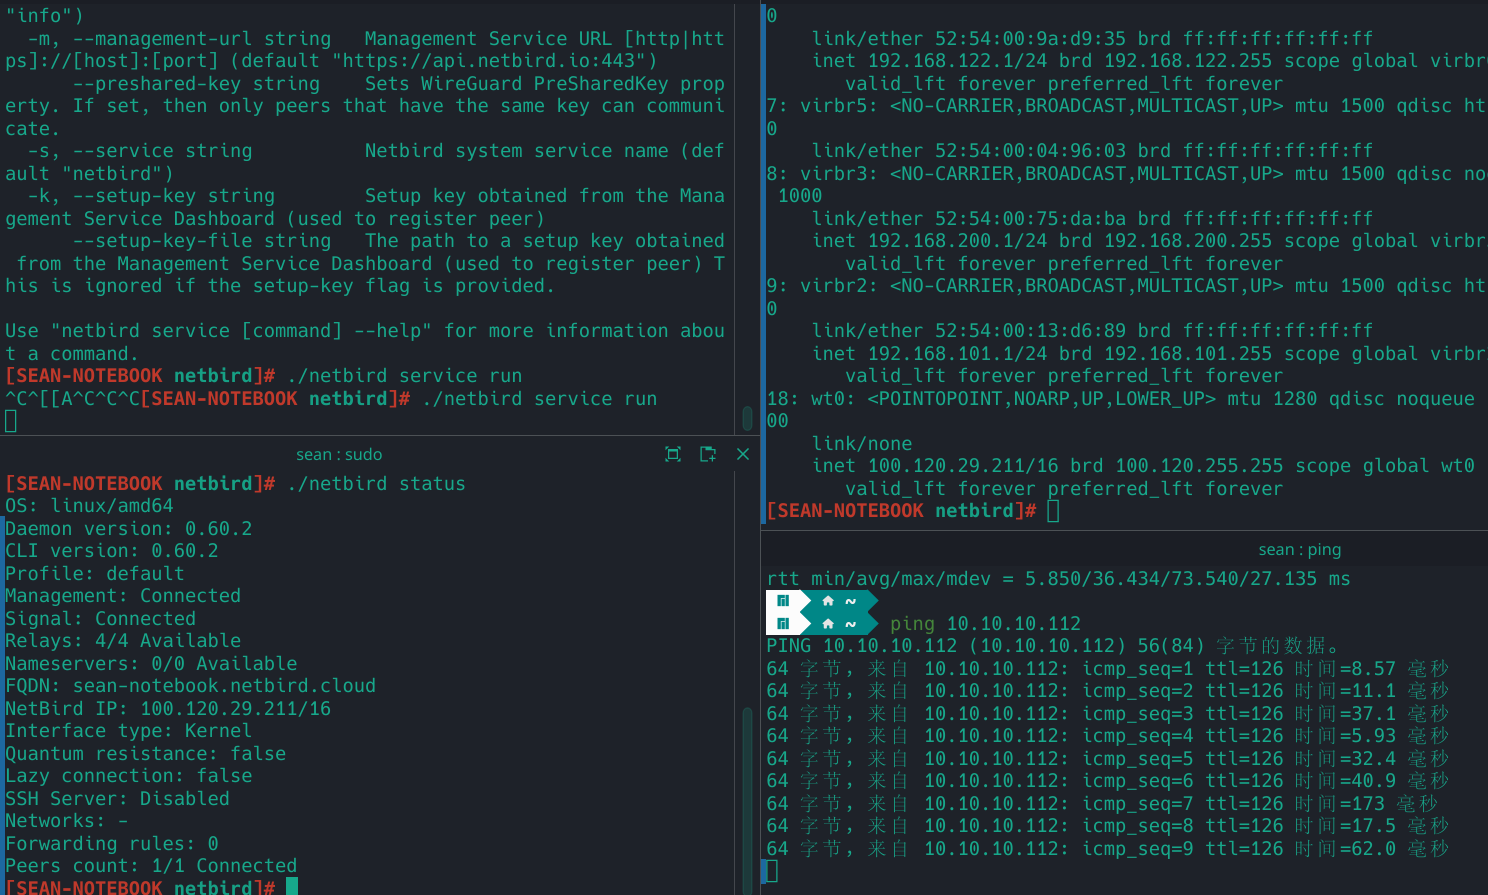
- From
Device 3, pingDevice 1; traffic passes throughDevice 2.