EasyTier
Deploying EasyTier involves the following steps:
- Build an EasyTier container.
- Start the container and create a Flow that uses it as the egress.
- Configure the EasyTier control plane.
- Configure Full Cone NAT.
- Configure routing so LAN clients can reach EasyTier addresses and subnets.
Building the EasyTier Container
First create a Dockerfile:
FROM debian:bookworm

RUN echo "deb https://mirrors.ustc.edu.cn/debian/ stable main contrib non-free" > /etc/apt/sources.list && \
    echo "deb https://mirrors.ustc.edu.cn/debian/ stable-updates main contrib non-free" >> /etc/apt/sources.list && \
    echo "deb https://mirrors.ustc.edu.cn/debian-security stable-security main contrib non-free" >> /etc/apt/sources.list

RUN apt-get update && \
    apt-get install -y --no-install-recommends \
        ca-certificates \
        iproute2 \
        iptables \
        wireguard-tools \
        curl \
    && rm -rf /var/lib/apt/lists/*

COPY easytier-core /easytier-core
RUN chmod +x /easytier-core

COPY redirect_pkg_handler /redirect_pkg_handler
RUN chmod +x /redirect_pkg_handler

COPY start.sh /start.sh
RUN chmod +x /start.sh

ENTRYPOINT ["/start.sh"]
Create start.sh in the same directory. Configure the control plane using EasyTier's documentation, or use the official web console and create an account. This example uses the official console; the account name is the only value required here.
#!/bin/bash
set -eo pipefail

echo "[redirect_pkg_handler] starting..."
/redirect_pkg_handler -m route &

# Start EasyTier; replace the value after -w with your username
/easytier-core -w <username> --machine-id <machine id> --hostname <name shown in the web console> &

for i in $(seq 1 10); do
    ip link show tun0 && break
    sleep 1
done

iptables -t nat -A POSTROUTING -o tun0 -j MASQUERADE

wait
Download redirect_pkg_handler and the EasyTier binary from their respective release pages. The directory should then contain:
tree
.
├── Dockerfile
├── easytier-core
├── redirect_pkg_handler
└── start.sh
Then build the image:
docker build -t <tag> .Starting the container
WARNING
Set a fixed Docker bridge name. If Docker generates a new interface name after a restart, the LAN service cannot start correctly.
networks:
  easytier-bridge:
    driver: bridge
    driver_opts:
      # Keep the bridge name fixed so it remains stable across restarts.
      com.docker.network.bridge.name: easytier-br0
Then start it with your own compose configuration.
services:
  easytier:
    image: <tag of the image you built>
    container_name: easytier
    restart: unless-stopped
    cap_add:
      - NET_ADMIN
      - SYS_ADMIN
      - PERFMON
    devices:
      - /dev/net/tun
    sysctls:
      net.ipv4.ip_forward: '1'
      net.ipv6.conf.all.forwarding: '1'
      net.ipv6.conf.all.accept_ra: '2'
      net.ipv6.conf.all.autoconf: '1'
      net.ipv6.conf.default.accept_ra: '2'
    volumes:
      # For lkit deployments, use /root/.lkit/landscape/data/unix_link/ as the host path.
      - /root/.landscape-router/unix_link/:/ld_unix_link/:ro
    networks:
      easytier-bridge:
        ipv4_address: 172.189.0.10 # optionally pin the container IP
    dns:
      - 172.189.0.1 # setting this to the bridge IP lets it use the default flow's DNS configuration

networks:
  easytier-bridge:
    driver: bridge
    enable_ipv6: true
    driver_opts:
      com.docker.network.bridge.name: easytier-br0
    ipam:
      config:
        - subnet: 172.189.0.0/24
          gateway: 172.189.0.1
Create a Flow that uses this container as its egress. 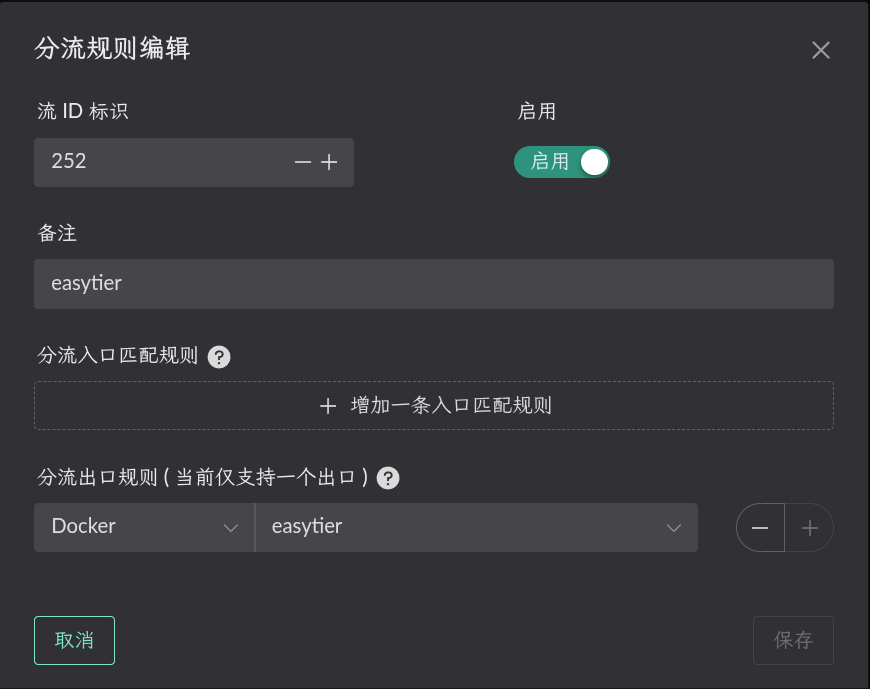
Configuring the EasyTier control plane
Sign in to the official web console, find the device in the device list, and click the gear icon.
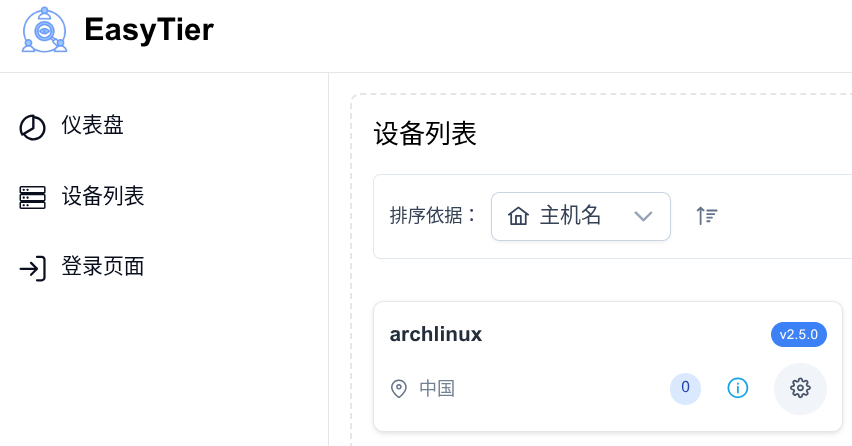
Open the management page.
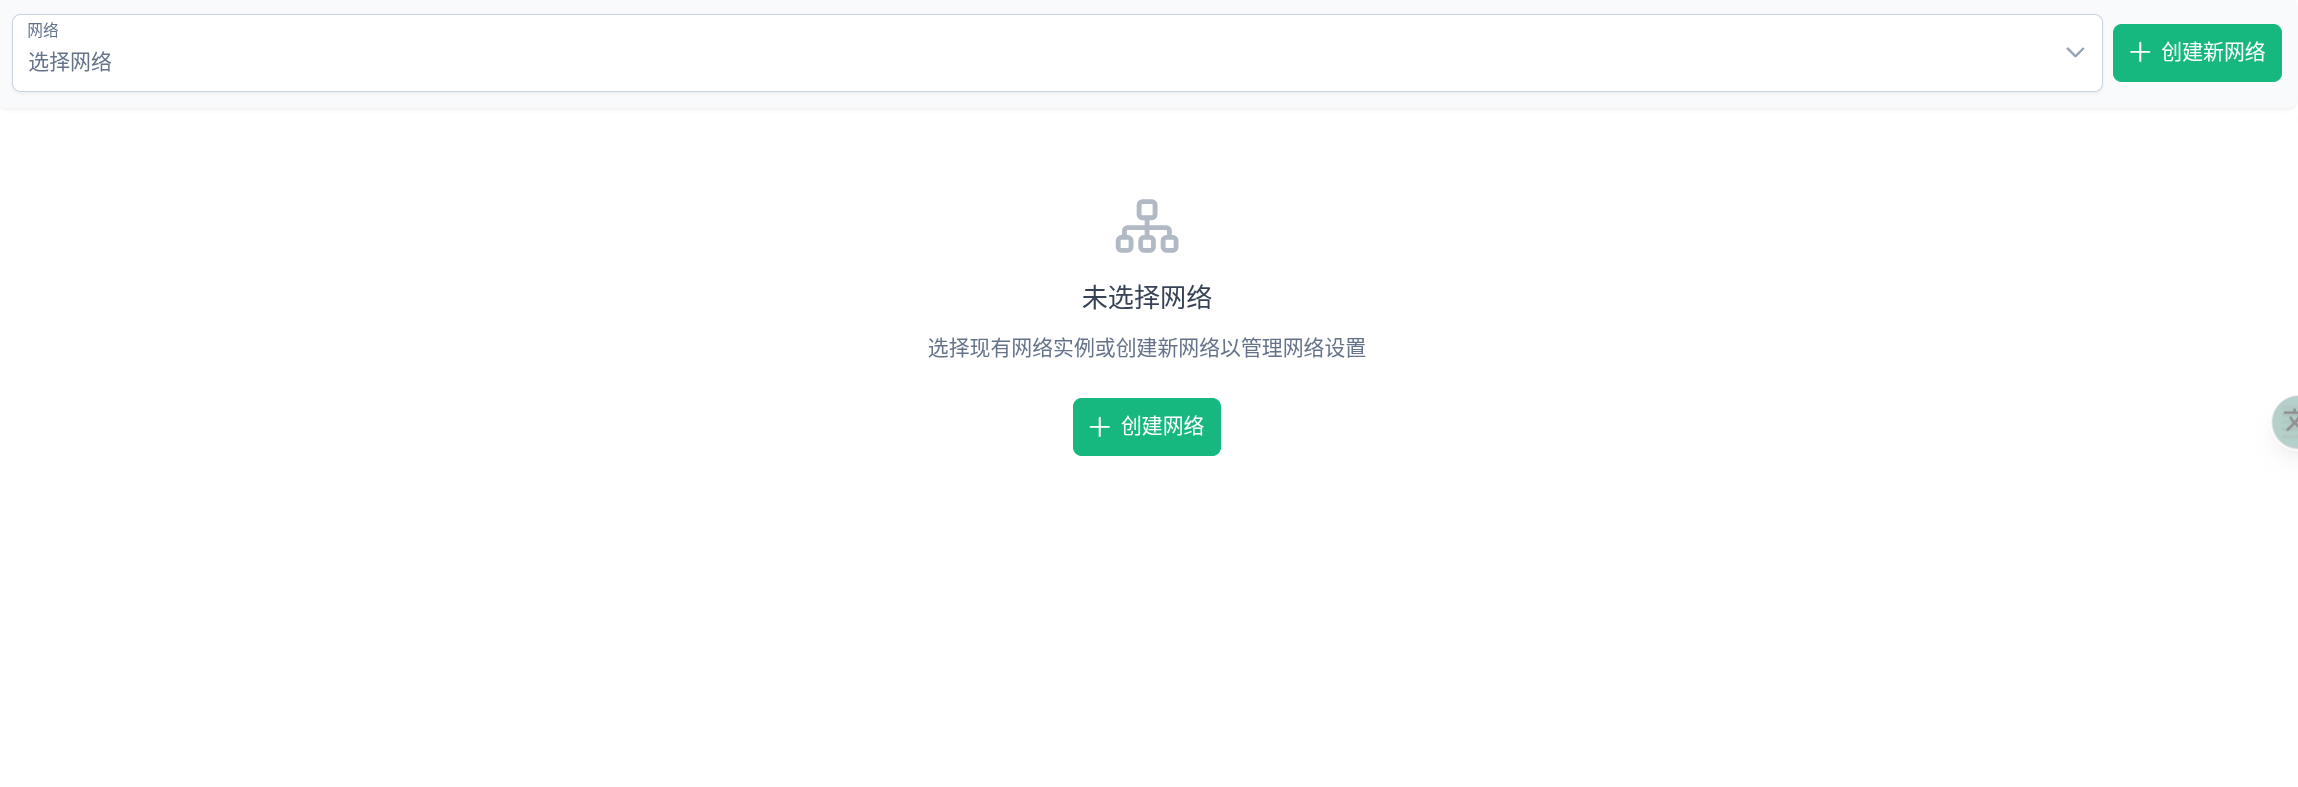
Choose to create a network.
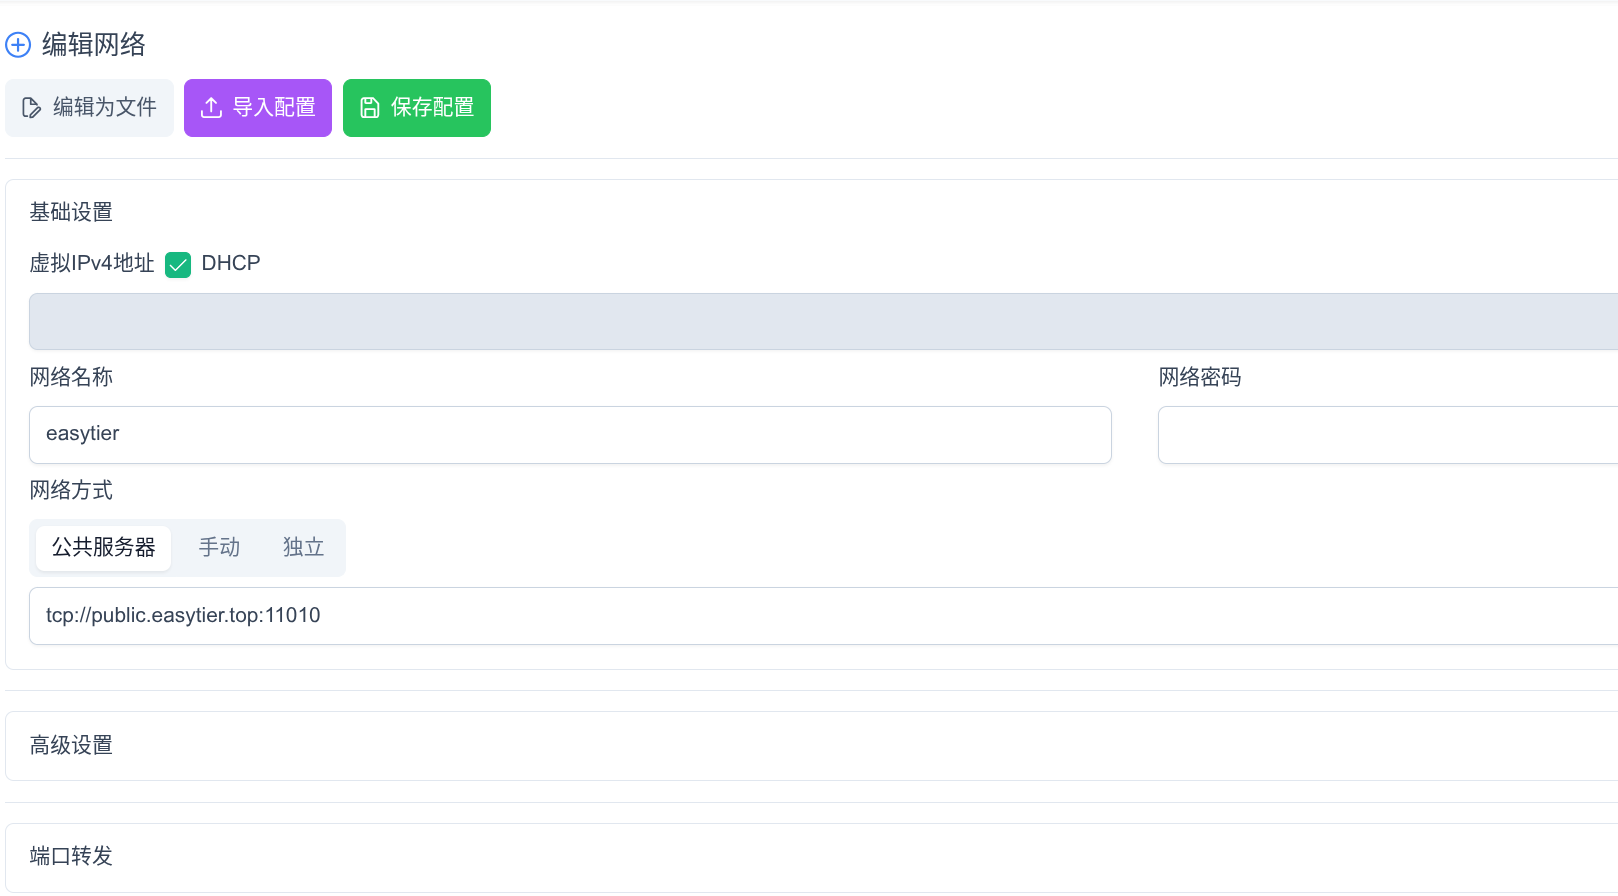
Complete the form to match your EasyTier network.
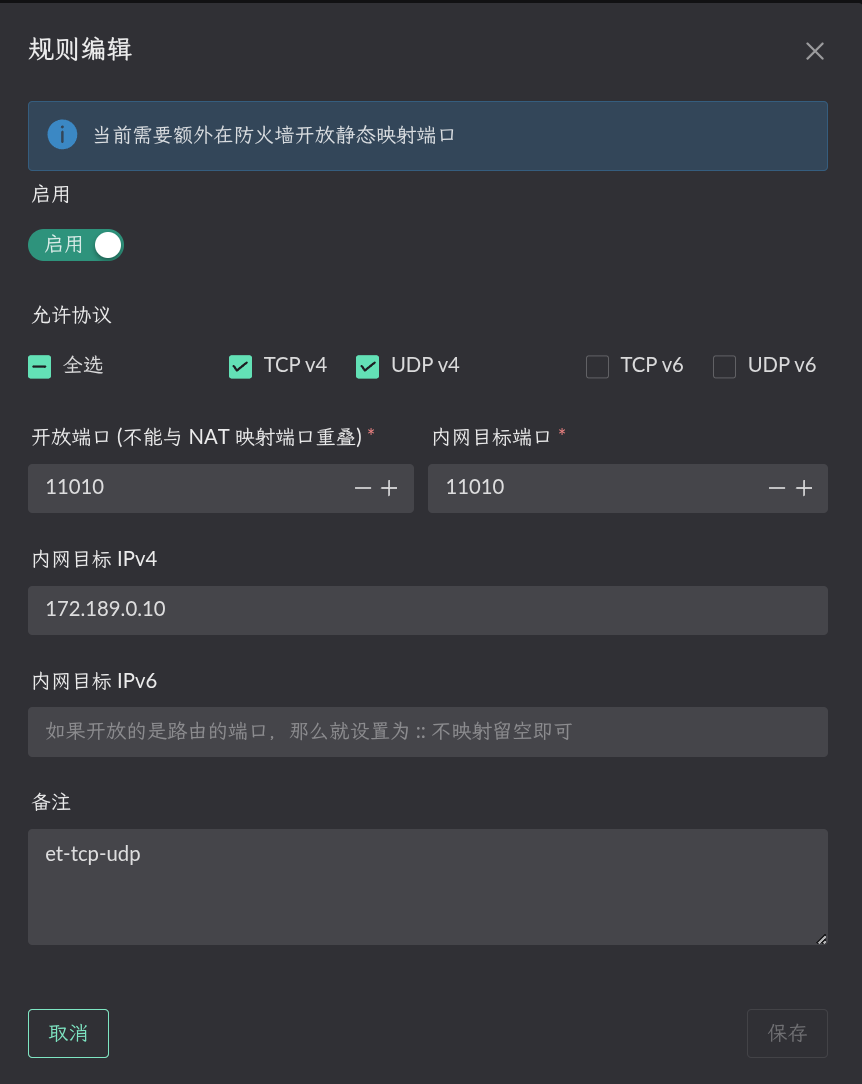
Configuring Full Cone NAT
First enable the Route LAN service on the bridge to which the container is attached. 
Static NAT configuration: the internal target port is the container port and the target IP is the container IP.
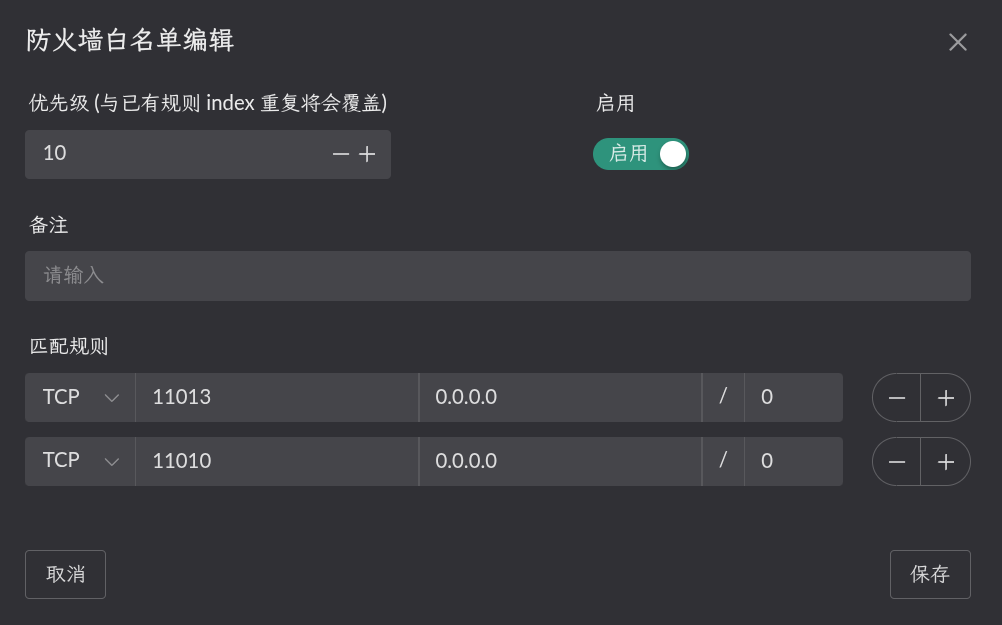
Open the matching port in the firewall.
Configuring route rules
Click Destination IP on the relevant Flow to configure a rule. Only traffic matching that rule uses the Flow. 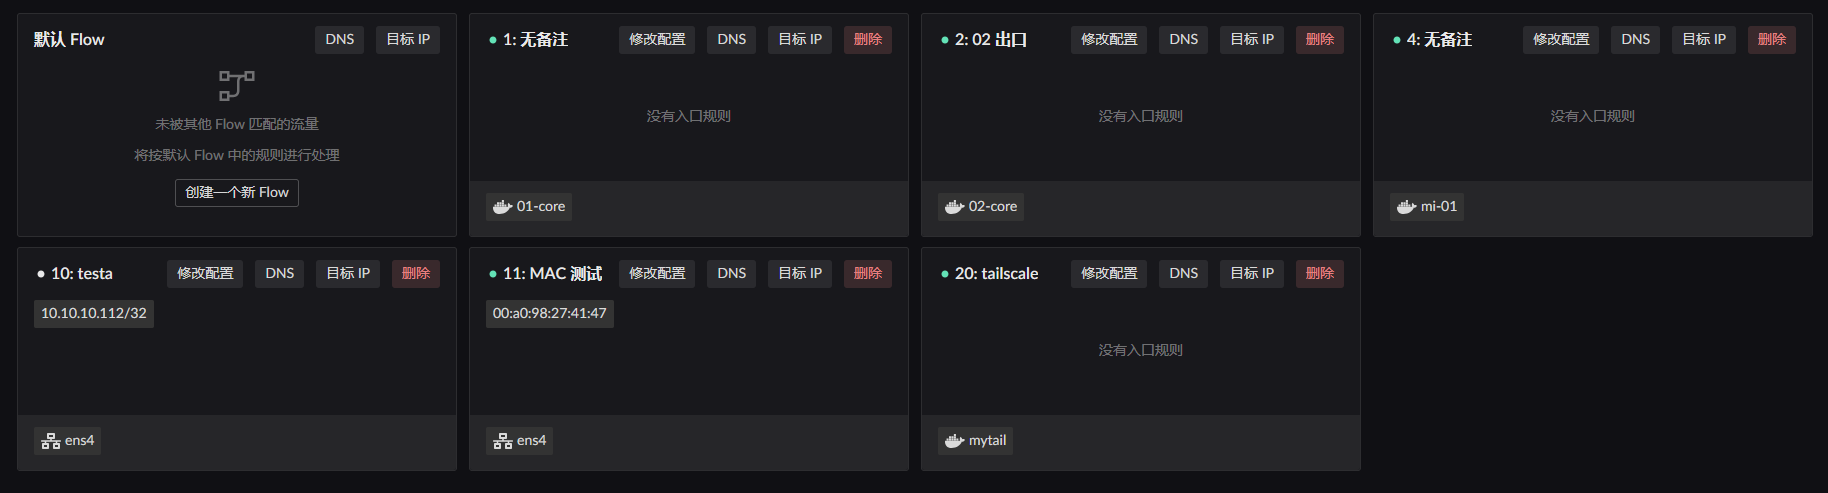
In this example, the LAN client with MAC address 00:a0:98:27:41:47 is governed by Flow 11. Configure Destination IP on Flow 11 and select Flow 252, the Flow created for the container, as the egress.
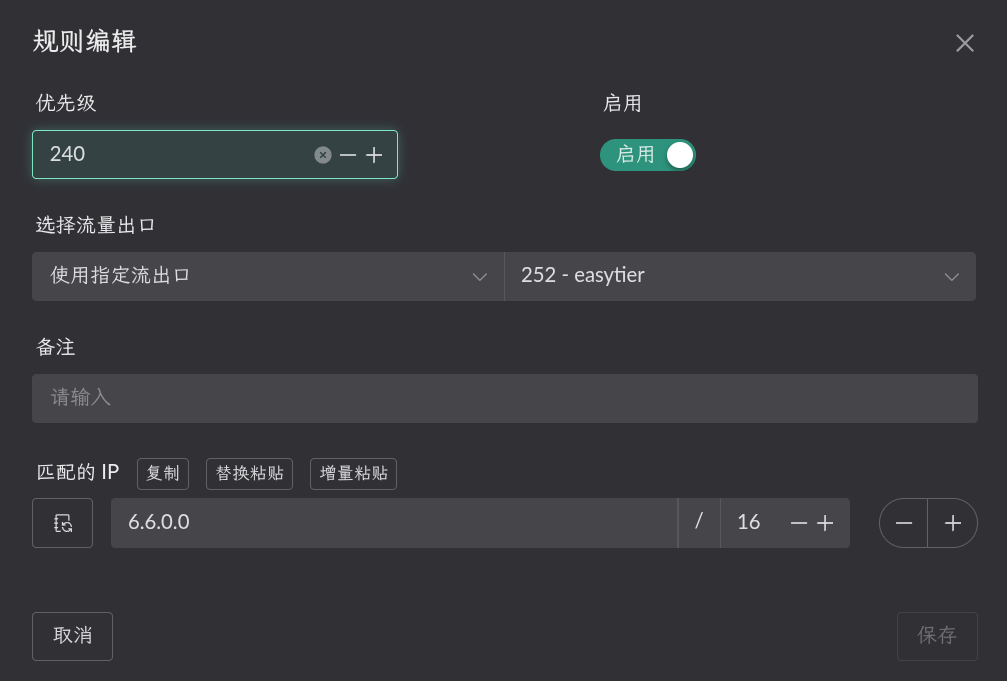
Traffic to 6.6.0.0/16 then uses the Flow 252 (EasyTier) egress and is forwarded into the easytier container.
The
6.6.0.0/16example assumes EasyTier is also deployed on the far side. In that case, configure the remote subnet directly to enable two-way access.