Basic Network Setup
This guide covers the basic network configuration: assigning interface zones, configuring addresses, and establishing internet connectivity.
The starting state
The example virtual machine has two network interfaces: ens32 and ens33. 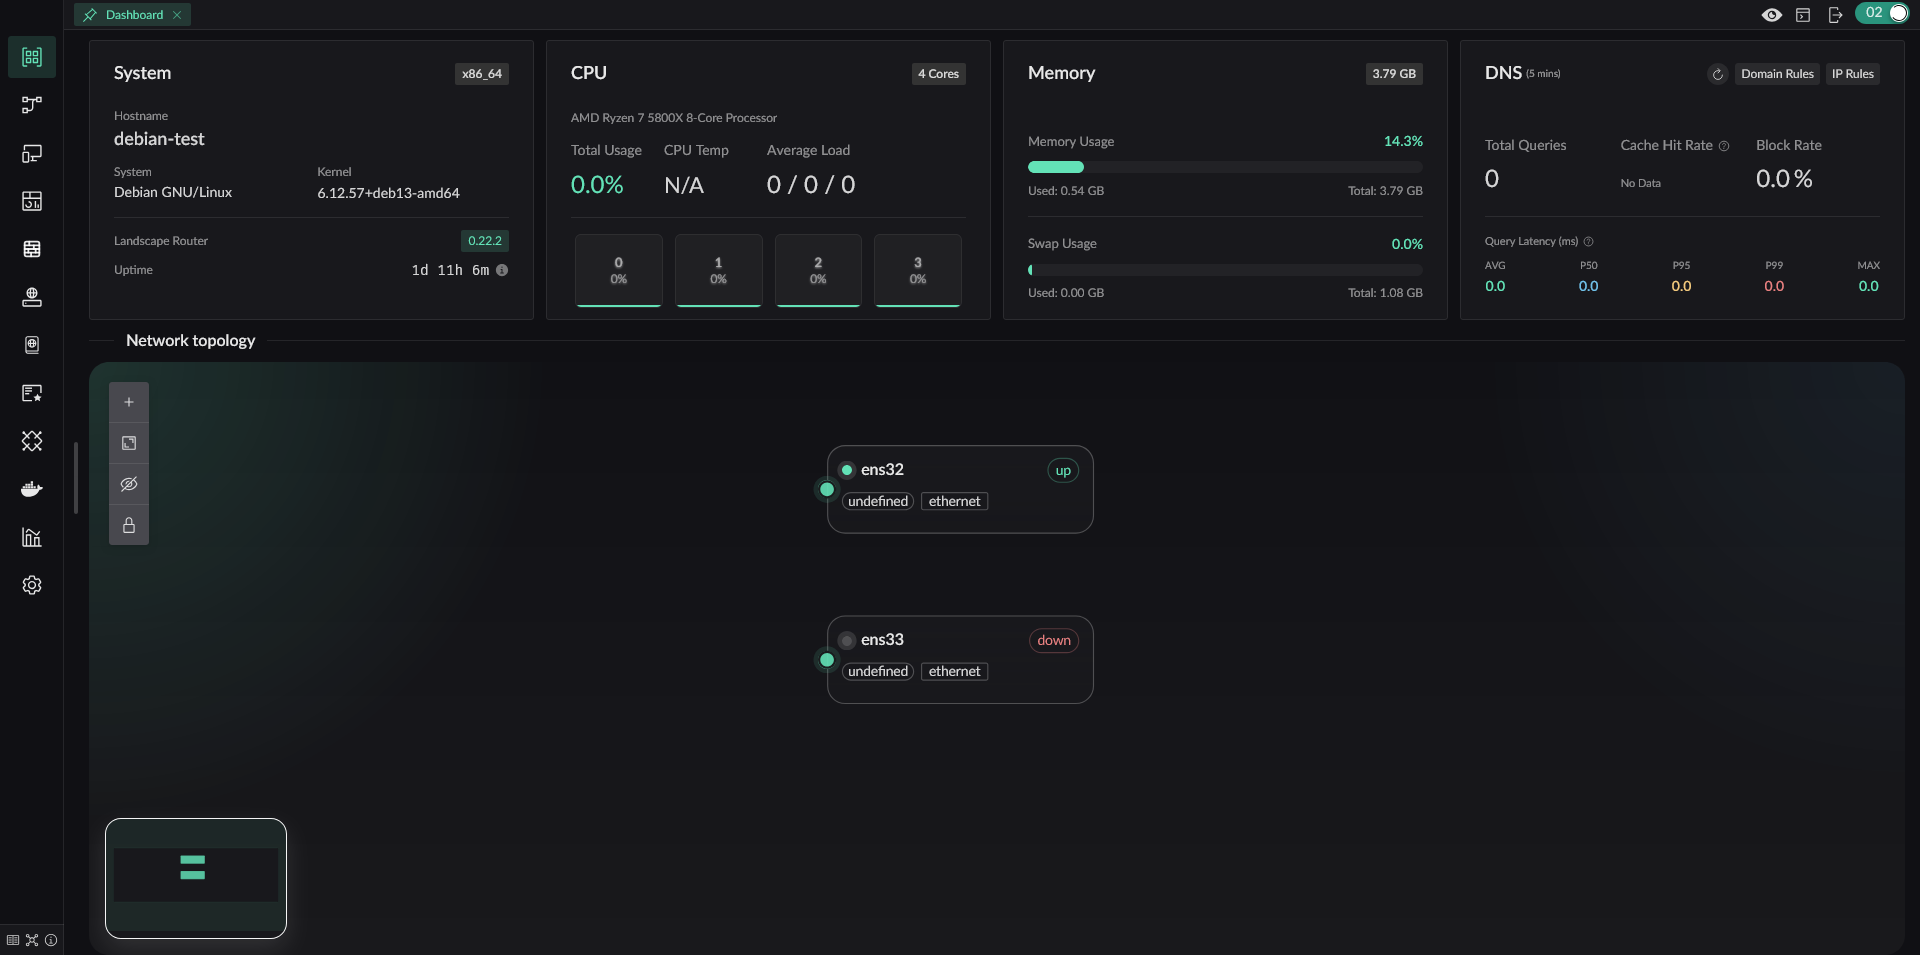
Switching interface zones
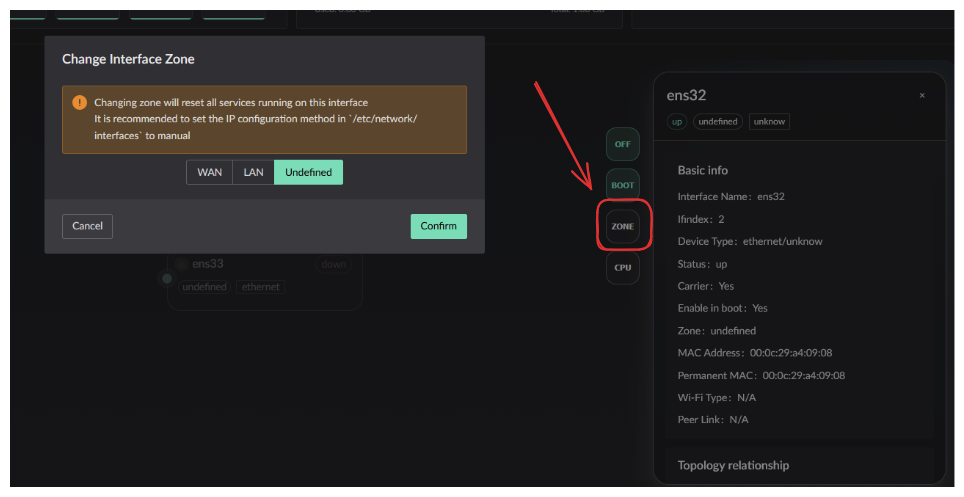
Assign each interface to a zone before configuring its services.
In simple terms
WAN = the port connected to the modem / external network
LAN = the port connected to your PC / switch.
For details, see: Zone
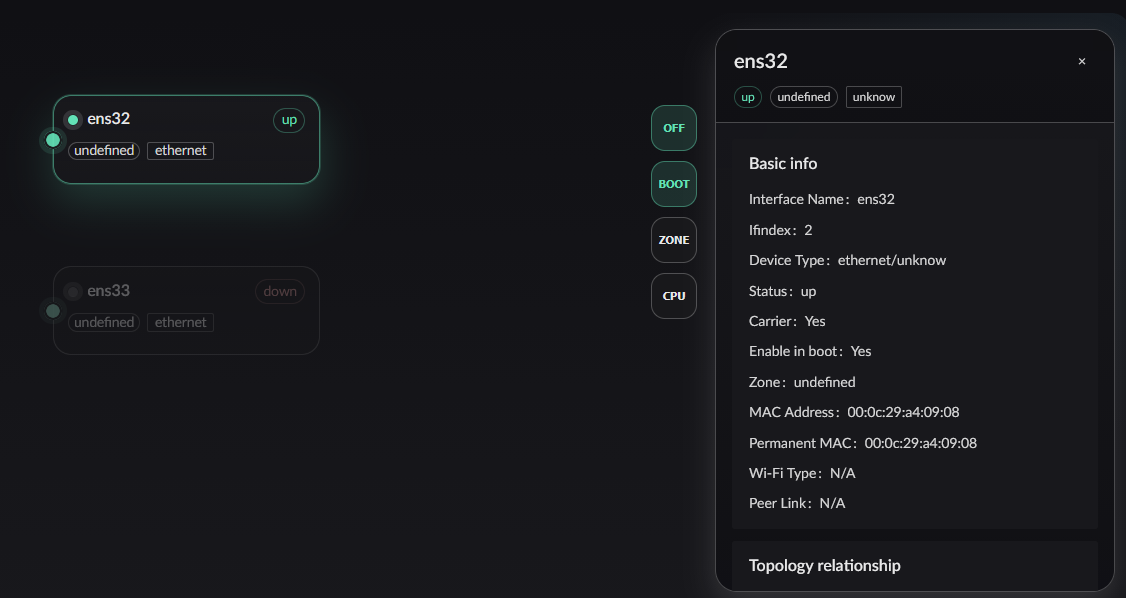
Select an interface to open its details panel, then click ZONE to open the zone settings.
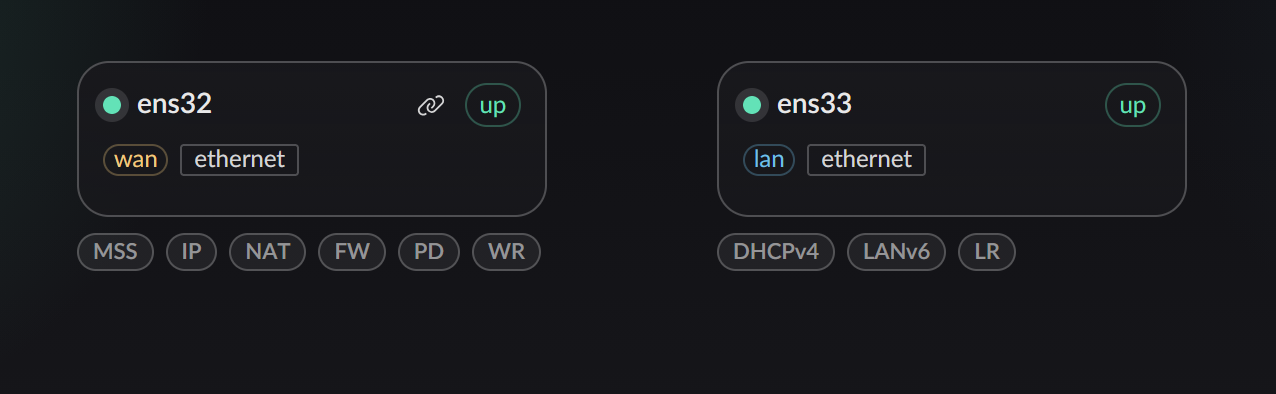
Confirm that both interfaces are assigned to the intended zones and show UP.
My interface is DOWN, what should I do
If an interface is DOWN, enable ON to bring it up and BOOT to start it automatically during boot. 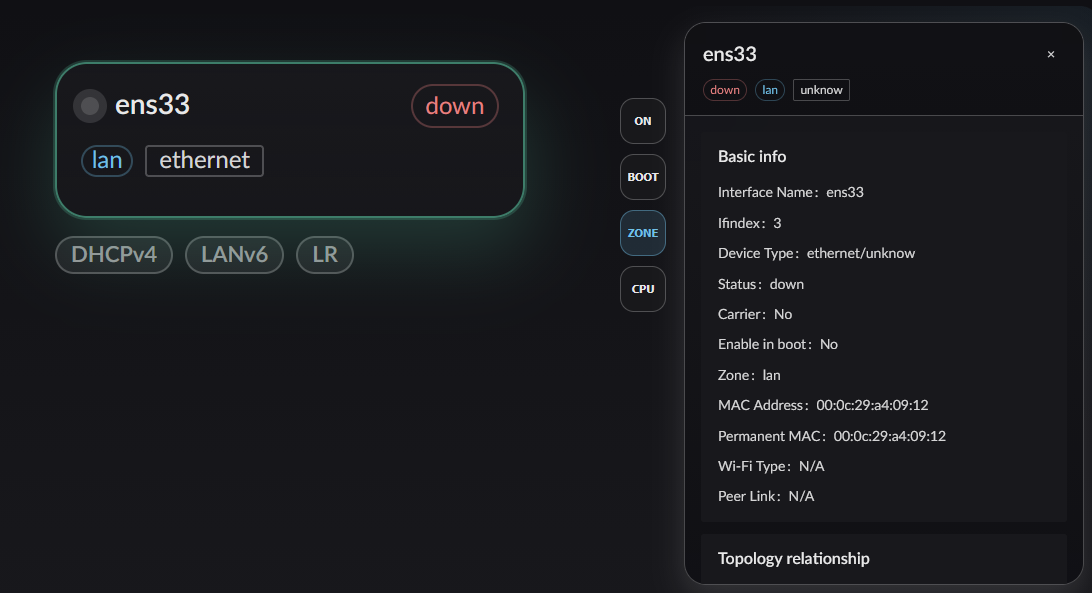
If the interface is still DOWN after that, make sure the network cable is plugged in.
Configuring WAN Connectivity
Click the IP button below the interface card: 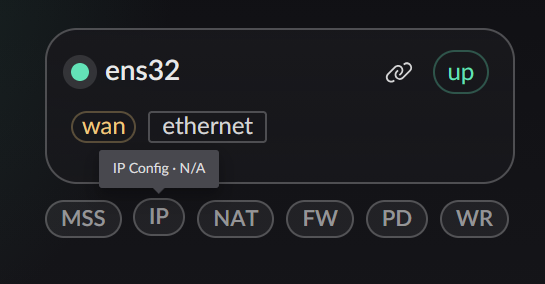
The WAN interface needs an IP configuration. Choose the method that matches the upstream network.
Use this when the modem or upstream router provides DHCP.
- Make sure the interface is assigned to the WAN zone
- Select the DHCP client configuration method
- Fill in a hostname (optional; leave empty to use the current hostname)
- Click save
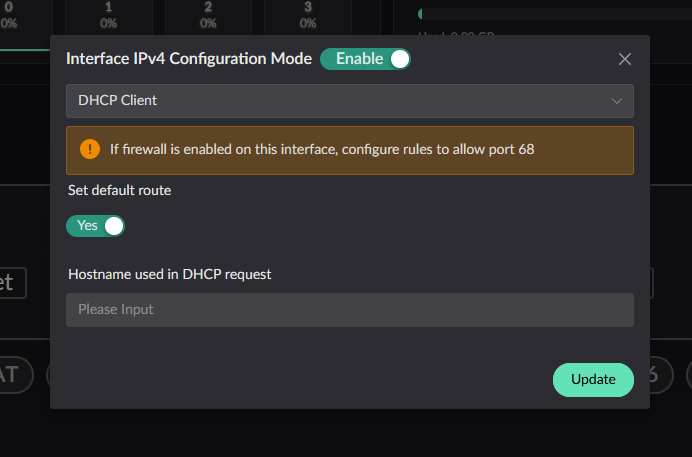
The router now has an upstream connection. Next, configure address assignment on the LAN.
Configuring LAN Address Assignment
The LAN port connects internal devices; the DHCPv4 service is usually enabled on it.
Make sure the interface is assigned to the LAN zone
Click the
DHCPv4service button below the interface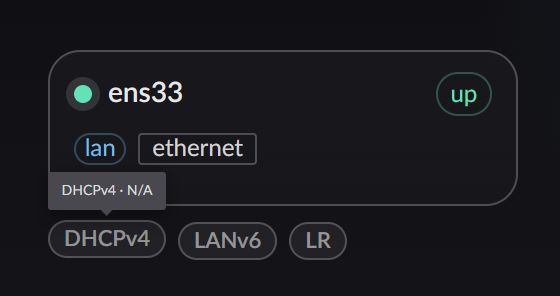
Configure the subnet to use
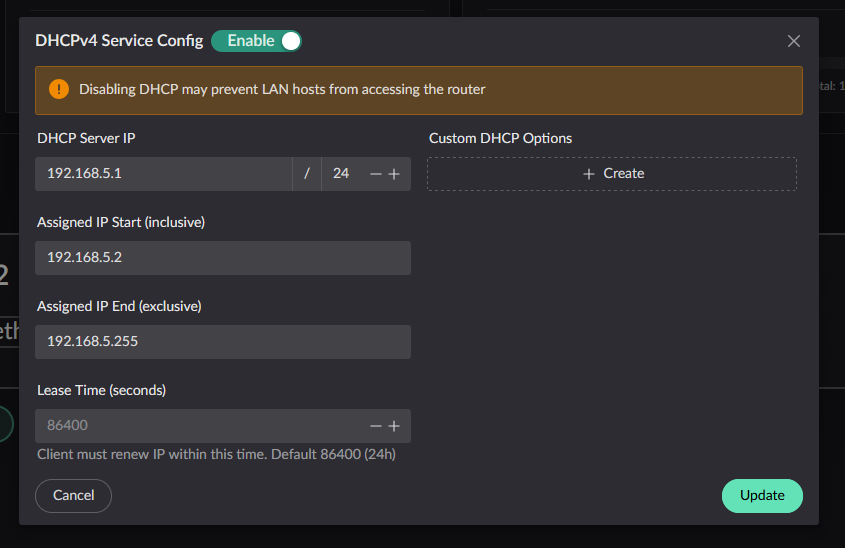
Click save
Configuring WAN/LAN Forwarding and NAT
After the steps above, the current network state is:
- LAN devices can reach the router via the DHCPv4 configuration
- The router itself can get online
- LAN-side devices cannot access the internet
Preserve remote access before enabling NAT
If the current management connection enters through the WAN interface, create a Static NAT mapping before enabling the NAT service. Enabling NAT first will disconnect that management session.
Static NAT mapping
Click Static NAT in the left menu to open the static NAT configuration page. Click the add button and configure as shown below to access the router from WAN. If you connect via LAN, you can ignore this. 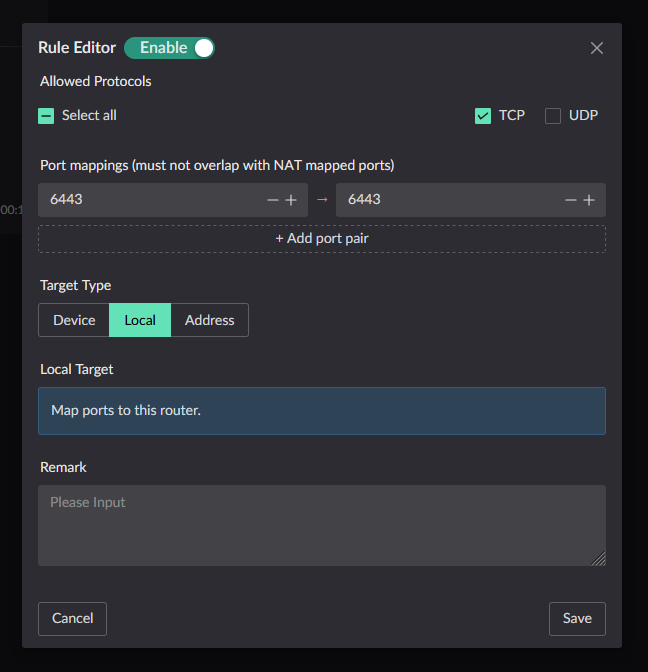
Now enable the WAN/LAN routing and forwarding services, as well as the NAT service: 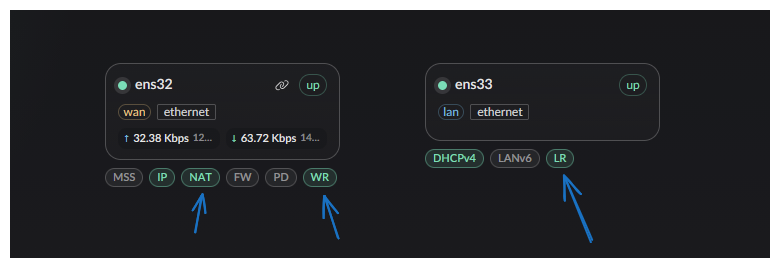
Verifying network connectivity
Verify the completed configuration:
- Open Metrics Monitoring → Connection Info to view the current connection status
- Run
ping 8.8.8.8on an internal device to test internet connectivity - Run
nslookup example.comto test DNS resolution
Next steps
After the basic network configuration, we recommend continuing with DNS Setup and Flow Setup.